You're ready for a brighter smile, but you're not sure whether to brush harder, use a whitening strip, or book professional treatment first. That uncertainty is common, especially before a wedding, a work event, or family photographs. If you're searching for a dentist near me, a cosmetic dentist near me, or a dentist in Walnut Creek, CA, the most important preparation step isn't choosing the strongest gel. It's confirming that your teeth and gums can tolerate whitening safely.
At William M. Schneider, DDS in Walnut Creek, the pre-whitening process starts with an exam, a discussion of your sensitivity history, and realistic expectations about shade changes. The same visit may also identify cavities, gum disease, cracked teeth, or restorations that need attention before cosmetic treatment. That exam-first approach helps patients avoid painful surprises and uneven results.
Why Walnut Creek Patients Are Asking About Pre-Whitening Prep
A patient may arrive at our Walnut Creek office with an at-home whitening coupon and a very specific goal, perhaps a brighter smile before a celebration in Rossmoor. The enthusiasm makes sense. What often surprises patients is how quickly the conversation moves away from product brands and toward gum health, existing crowns, sensitivity, and the color of the teeth before treatment begins.
Whitening works by changing the color of natural tooth structure. It won't bleach a crown, veneer, or composite filling, and it may aggravate a tooth that already has decay, a crack, exposed dentin, or a receding gumline. Those conditions can also make the final smile look uneven because natural enamel may lighten while older dental work stays the same shade. Clinical guidance recommends a full evaluation before bleaching, with attention to active caries, exposed dentin, periodontal disease, and restorations in the visible smile zone. See the clinical workflow for pre-bleaching assessment for the rationale behind these checks.
What we screen for first
At a pre-whitening appointment, a Walnut Creek dentist may look for:
- Untreated decay: Peroxide can be more irritating when decay has weakened the tooth.
- Cracked enamel: A crack may allow whitening material to reach sensitive internal areas.
- Receding gums and exposed roots: Root surfaces don't respond like enamel and may react more strongly.
- Gum inflammation: Inflamed tissue is more vulnerable to irritation from whitening gel.
- Crowns, veneers, and bonding: These restorations won't change color with peroxide.
- Existing sensitivity: A history of discomfort helps determine the safest concentration and schedule.
The American Dental Association notes that mild to moderate sensitivity can occur in up to two-thirds of users during early bleaching stages (ADA whitening guidance). That's why skipping preparation is one of the most common reasons whitening disappoints. The problem usually isn't that the patient chose the wrong shade. It's that treatment began before the mouth was ready.
The Pre-Whitening Dental Exam and Baseline Records
A useful pre-whitening consultation should give you more than a quick look and a product recommendation. It should establish whether whitening is appropriate, identify anything that needs treatment first, and document where your smile starts.
The clinical evaluation
The appointment generally begins with a review of your dental and health history. Tell the dentist about past whitening attempts, sensitivity, allergies to bleaching ingredients, gum concerns, medications, and your perception of the discoloration. The ADA notes that a bleaching evaluation may include radiographs, screening, and diagnostic tests when appropriate, as outlined in this pre-bleaching clinical guidance.
The dentist then examines the teeth, gums, and surrounding soft tissues. Visual inspection can identify cavities, cracked enamel, failing fillings, recession, and gum inflammation. Dental X-rays or bitewing images may be reviewed when there's concern about decay between teeth or other problems that aren't visible during a surface examination.
You can review the general process in this guide to what happens during a dental exam. The purpose is practical. Bleaching shouldn't begin over active disease or unexplained pain.
Baseline shade documentation
Shade records make the outcome easier to judge. The dental team may take intraoral photographs against a neutral shade reference, such as a Vita Classical or Bleach shade guide, and record the starting color before treatment. Digital scans or additional photographs can also help monitor wear, recession, and restorations.
Practical rule: A brighter smile is easier to evaluate when the starting shade, restoration locations, and treatment plan are documented before the first application.
Whitening results can't be predicted with complete accuracy. Enamel thickness, stain type, age of the discoloration, and prior dental work all affect the result. A baseline record keeps the discussion grounded in your teeth rather than in a marketing image.
Understanding Product Strength Before You Choose
Peroxide concentration affects treatment speed and the likelihood of sensitivity. Product names and light-activation claims matter less than four practical questions: Which bleaching agent is used? How strong is it? How long will it contact the teeth? How will the gums and exposed surfaces be protected?
For supervised home trays, an ADA guideline accepted 10±1% carbamide peroxide as a concentration with established safety and efficacy. That amount is roughly equivalent to 3.5% hydrogen peroxide (ADA-linked clinical evidence). Carbamide peroxide releases hydrogen peroxide more gradually, so tray whitening usually follows a slower schedule.
In-office systems use stronger hydrogen peroxide formulas. The ADA whitening topic page describes concentrations ranging from 15% to 43% hydrogen peroxide. Higher strength can shorten chairside treatment, while also increasing the chance of sensitivity. Professional supervision and careful protection of the soft tissues therefore matter.
| Method | Active ingredient | Typical concentration | Treatment time | Sensitivity risk |
|---|---|---|---|---|
| Supervised home trays | Carbamide peroxide | 10±1%, roughly 3.5% hydrogen peroxide (clinical evidence on home bleaching) | Gradual treatment schedule | Generally lower than stronger in-office formulas, though sensitivity remains possible |
| In-office whitening | Hydrogen peroxide | 15% to 43% (ADA whitening guidance) | Faster chairside treatment | Higher concentration increases sensitivity risk |
A sensitive patient may tolerate a lower-strength system better, with more time allowed for the result. Someone facing a short deadline may prefer in-office care if the examination supports it. The appropriate choice depends on oral health, sensitivity history, restorations, and the desired timeline, not on selecting the strongest available product.
A Proven Sensitivity-Prevention Protocol
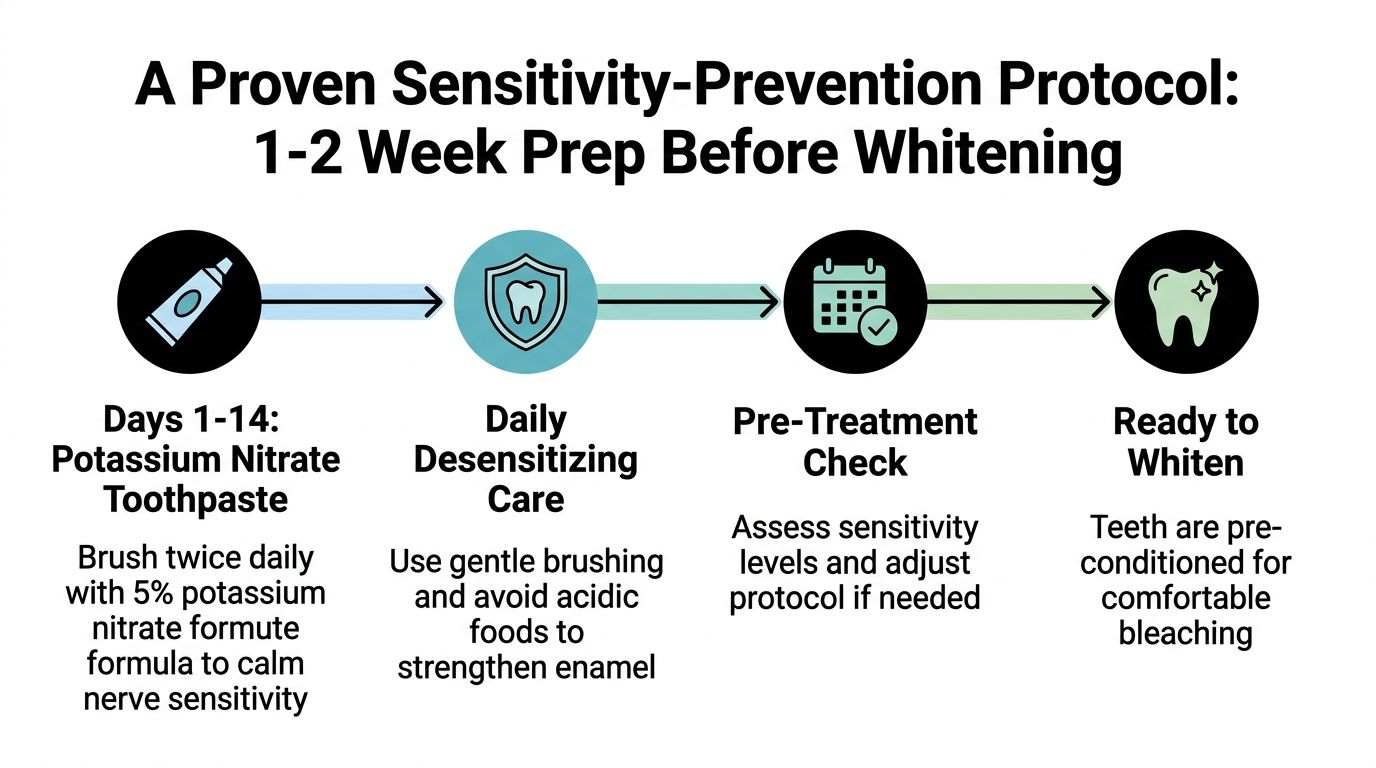
If cold drinks already bother you, or whitening caused discomfort previously, prepare before peroxide reaches the enamel. A practical starting point is desensitizing toothpaste containing potassium nitrate for about one to two weeks before treatment. For patients with more pronounced sensitivity, clinical protocols also describe desensitizing gel for one hour daily during the week before bleaching (sensitivity-prevention review).
Use the protocol consistently. Applying a product once rarely provides the same benefit as regular use. Brush gently, since heavy pressure can irritate the gumline and expose more sensitive tooth surfaces.
Match the protocol to your risk
Recession, exposed roots, cracked enamel, or a previous sensitivity episode may call for an individualized plan. A dentist may recommend potassium nitrate toothpaste, fluoride gel, or another desensitizing product before treatment. Research has also examined potassium nitrate and sodium fluoride preparations for reducing sensitivity intensity without reducing bleaching effectiveness (dental sensitivity research).
The goal is manageable treatment, not complete loss of sensation. Your dentist should reduce avoidable discomfort while selecting a whitening system your teeth can tolerate.
Chewing gum is not a substitute for a dentist-selected desensitizing protocol, and oil pulling, activated charcoal, and improvised internet remedies do not address the same clinical risk.
Review this guide to reducing tooth sensitivity after whitening for aftercare guidance.
Here's a short visual explanation of how sensitivity can occur and why preparation matters:
Habits, Hygiene, and Old Restorations to Address First
Brushing harder won't make peroxide work better. It can abrade enamel, irritate the gums, and worsen discomfort at the gumline. Chewing gum before treatment is not a dependable whitening strategy, and activated charcoal can be abrasive without solving the underlying issue.
Clean teeth give whitening gel more even contact with enamel. Professional whitening instructions commonly recommend brushing and flossing just before each session because plaque and tartar can interfere with gel contact (professional tray instructions). If your gums bleed, feel swollen, or have been diagnosed with gingivitis, address that problem before cosmetic bleaching.
Cleaning and stain control
A dental cleaning can remove plaque, tartar, and surface stain that make teeth look darker before whitening begins. It also gives the dentist a chance to check whether a stain is external or whether the discoloration may require a different cosmetic or restorative approach.
Coffee, red wine, and tobacco can add new pigment during a whitening course. Reducing those exposures before and during treatment can help protect the shade you're trying to achieve. You don't need an extreme diet, but you should understand that whitening doesn't make stain-producing habits irrelevant.
Restorations need a separate plan
Crowns, veneers, and bonding won't bleach. If the natural teeth lighten beyond the shade of an older restoration, the restoration may need replacement or cosmetic adjustment to match. That decision should be made after the natural teeth reach their intended shade, not before.
The honest expectation: Whitening changes natural tooth structure. It doesn't repaint every material in your smile.
That distinction is especially important for patients considering broader cosmetic dentistry, restorative dentistry, or dental implants. If a tooth also needs a crown, root canal, tooth extraction, or implant planning, the sequence of care may matter more than whitening alone.
Your Pre-Whitening Checklist and Next Steps
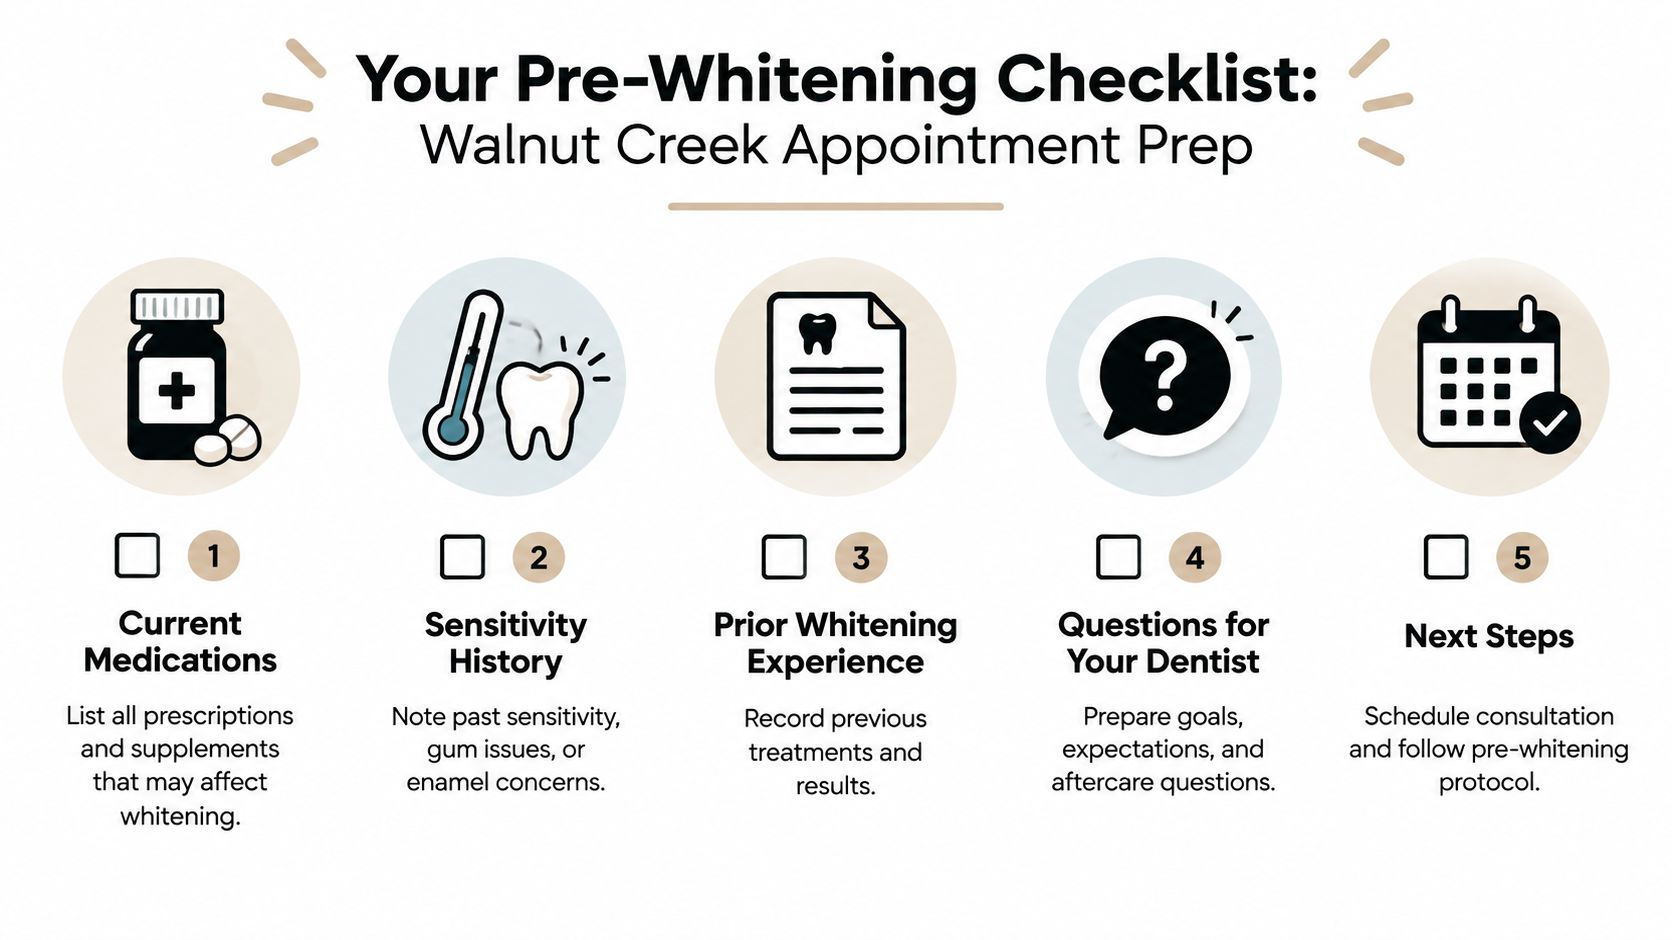
A patient arrives for whitening with a history of sharp pain from cold drinks, an older crown, and a whitening kit chosen online. Those details change the plan. Bring useful information to your Walnut Creek consultation so Dr. Schneider's team can assess your mouth rather than rely on a generic product label.
Bring these details
- Current medications: List prescriptions, supplements, and known allergies to treatment ingredients.
- Sensitivity history: Note whether cold air, drinks, brushing, or earlier whitening caused pain.
- Prior whitening experience: Include strips, trays, in-office treatment, and how your teeth responded.
- Restoration inventory: Mention crowns, veneers, bonding, large fillings, implants, and root canal-treated teeth.
- Shade expectations: Describe your goal, whether modest brightening or a larger cosmetic change, while understanding that results vary.
Complete the practical preparation
- Schedule a cleaning when needed: If it has been more than six months since your last dental visit, ask whether a cleaning and exam should come first.
- Avoid acidic foods before treatment: For the 48 hours before whitening, limit foods and drinks that may aggravate already sensitive enamel. Chewing gum or brushing harder does not prepare teeth for bleaching.
- Take a natural-light photograph: A casual photo helps you compare your starting appearance, although dental shade records are more reliable.
- Try trays before adding gel: Professional instructions may recommend checking fit and comfort with empty trays first.
- Choose your timing carefully: The ADA reports that sensitivity with strip or tray whitening often begins within two to three days after treatment starts and usually resolves by the fourth day after treatment ends (ADA whitening information). Avoid scheduling treatment immediately before an important event when possible, since temporary sensitivity can make eating and drinking uncomfortable.
Know when whitening isn't the first appointment
If the examination finds active decay, gum disease, a cracked tooth, or a restoration needing attention, address that problem before cosmetic treatment. Patients looking for an emergency dentist, tooth extraction, or dental implants near me may need urgent or restorative care first. Whitening can remain an option after the mouth is stable, with the treatment sequence set around predictable results.
At a Walnut Creek consultation, Dr. Schneider's team reviews your dental history, examines your teeth and gums, records your baseline shade, and discusses whether home trays or in-office whitening suits your needs. That preparation separates a measured plan from an impulse treatment that may leave you disappointed.
William M. Schneider, DDS provides dental exams, cleanings, cosmetic dentistry, and teeth whitening for patients in Walnut Creek and the surrounding East Bay community. Schedule a pre-whitening consultation at William M. Schneider, DDS so treatment begins with an exam, clear expectations, and a plan suited to your smile.